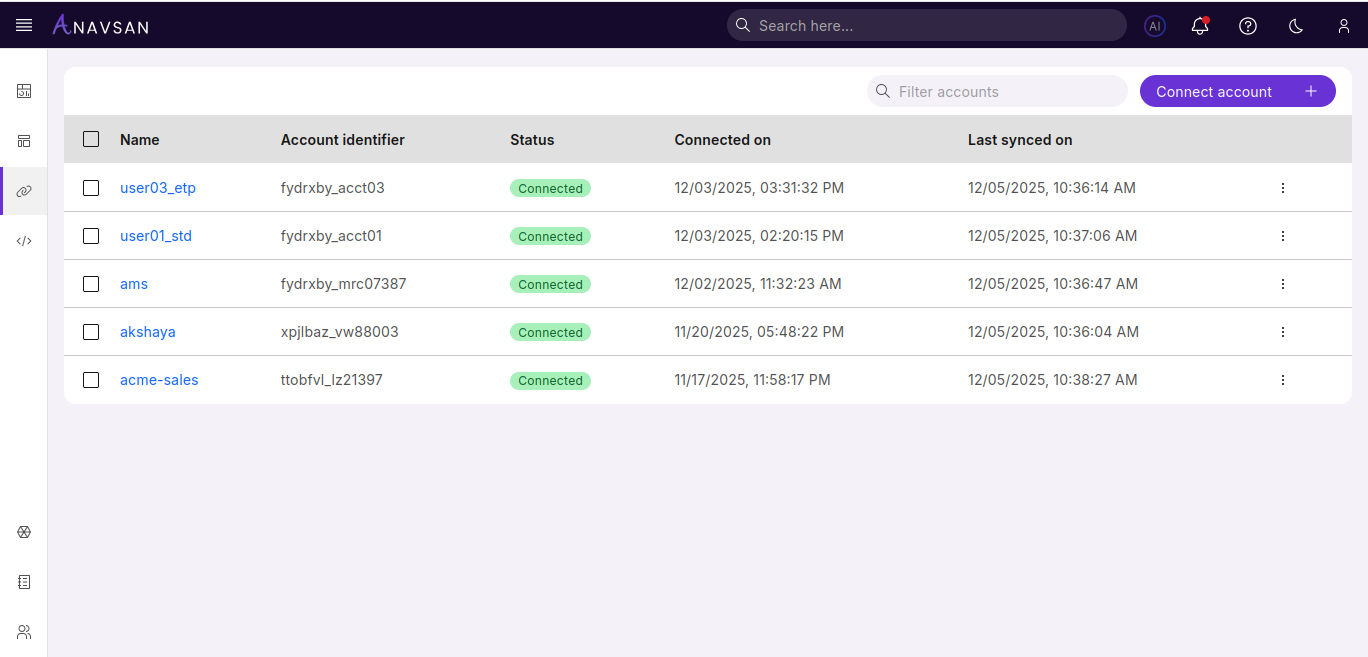
Accounts List
This page displays all your connected Snowflake accounts in a centralized table view and helps you manage and monitor multiple Snowflake connections.
Connected Snowflake Accounts
Once you connect Snowflake accounts, the table populates with account details and metrics.
Search and Filter
- Use the Filter accounts search bar to find specific accounts by name or identifier
Sort Accounts
- Click the Name column header to sort accounts alphabetically
Select Accounts
- Use checkboxes to select multiple accounts
- Click Remove in the toolbar to delete selected accounts
Table Columns
| Column | Description | Use Case |
|---|---|---|
| Name | Account display name | Click to view account details and access monitoring tools |
| Account Identifier | Unique Snowflake account identifier | Reference specific account for API calls or support requests |
| Status | Current connection status | Verify account connectivity and troubleshoot connection issues |
| Connected On | Date when account was connected | Track account age and review historical connection timeline |
| Last synced on | Timestamp of the most recent data synchronization | Verify data freshness and track when account information was last updated |
Actions Menu
Click the three-dot menu icon at the end of each row to access:
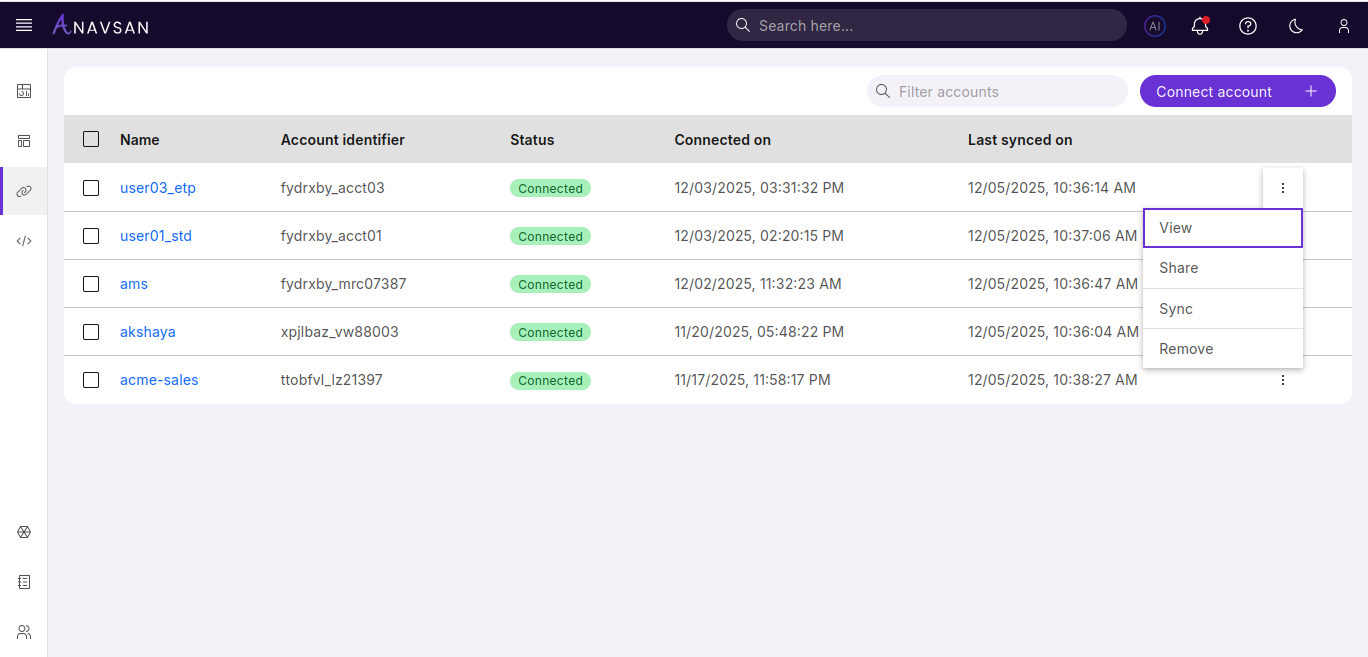
- View - Opens the Account Overview page
- Share - Opens a panel to share account access with another user
- Sync - Manually triggers immediate data synchronization from Snowflake to refresh account metrics and query data
- Remove - Opens a confirmation pop-up to delete the account
Share Account
FinOps can share access to a Snowflake account with other Anavsan users using the Share account option. Access can be shared only with users who already exist in the Snowflake account. If the selected user is not yet part of Anavsan, they will receive an email invitation to join.
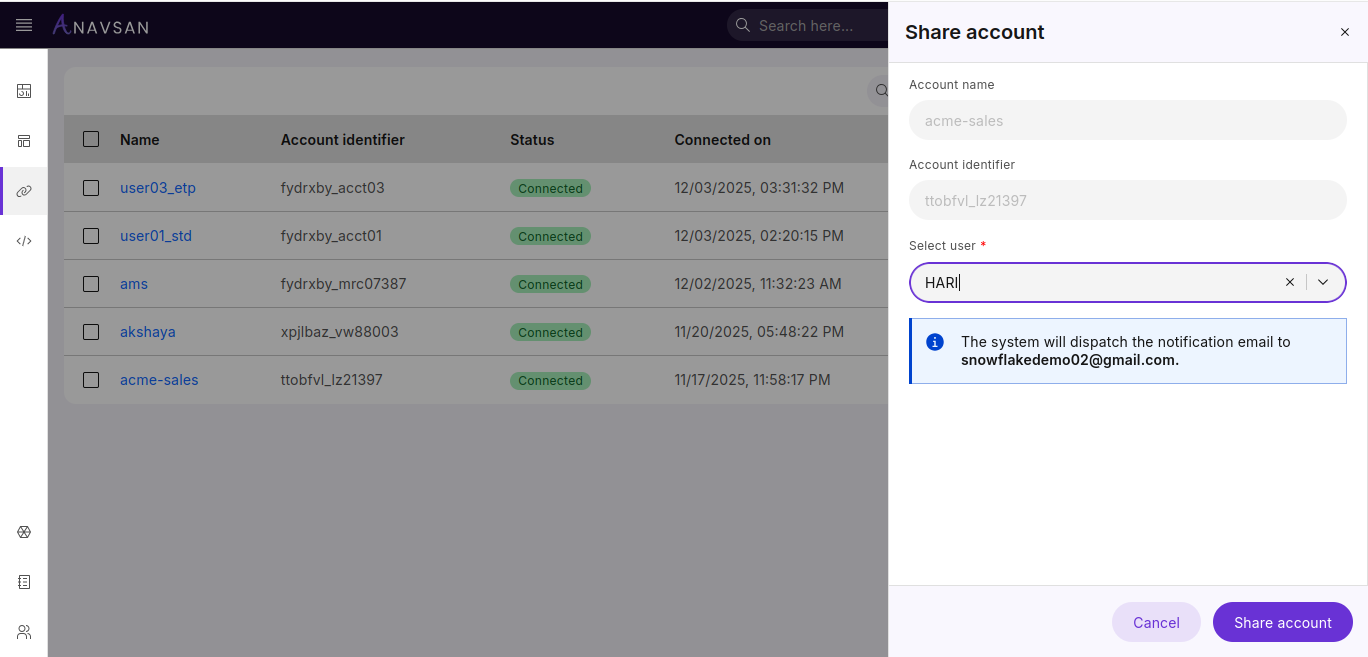
The panel displays:
- Account name
- Account identifier
- A required Select user field for assigning access
Select a User
Users can be searched and selected from the dropdown.
- Type to search for a user
- Select a user from the results
- Remove or update the selection anytime
Manual Email Entry
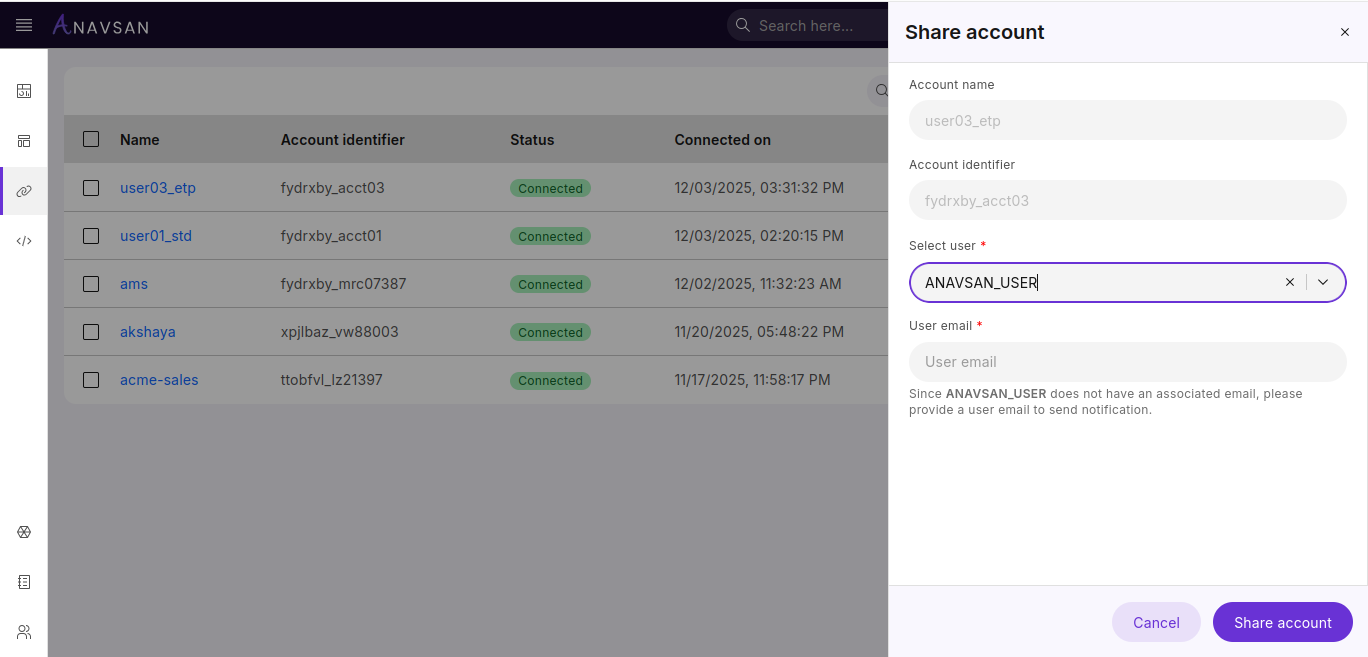
If the selected user does not have an email address associated with their account, the system will prompt you to manually enter an email address. This ensures the user can receive the notification about the shared account access.
- An Email field appears when the selected user has no registered email
- Enter the user's email address manually
- The system will send the notification to this provided email address
Email Notification
After selecting a user from the dropdown, a message appears indicating that an email notification will be sent.
The panel confirms:
The system will dispatch the notification email to the user's registered email address.
Note: If you manually entered an email address (when the user had no registered email), the notification will be sent to the email address you provided.
Complete the Share Action
- Click Share account to grant access
- Click Cancel to close the panel without making changes
Remove Confirmation
When removing an account, a pop-up appears to confirm the action.

Next Steps
Click on any account name in the list to navigate to the Account Details page. From there, you can access comprehensive monitoring and analysis tools including query performance metrics, cost breakdowns, optimization recommendations, and detailed usage insights for that specific account.