Add Dashboard
Use this page to create or edit dashboards by configuring scope, entering details, and selecting widgets for display.
Why Customizable Dashboards?
Dynamic Data Visualization Beyond Static Reports
Instead of letting people lock themselves inside static dashboards, Anavsan provides you customizable dashboards which dynamically update your data. You can create the dashboard with widgets available in the Widgets Factory. Unlike traditional BI tools with rigid layouts, Anavsan dashboards adapt to your needs—add, remove, or rearrange widgets to focus on the metrics that matter most to your goals.
Dashboard Highlights
- Build custom dashboards from a library of pre-configured widgets in the Widgets Factory
- Real-time data updates across all widgets when filters change
- Switch between accounts and warehouses without rebuilding dashboards
- Drag-and-drop interface for intuitive dashboard design and widget arrangement
- Preview dashboards before saving to ensure the layout meets your needs
- Create account-level or overall dashboards to match different reporting scopes
Step 1: Set Dashboard Scope
Use the toggle at the top of the page to choose:
- Account-level Dashboard - Monitor a specific Snowflake account
- Overall Dashboard - View aggregated data across all connected accounts
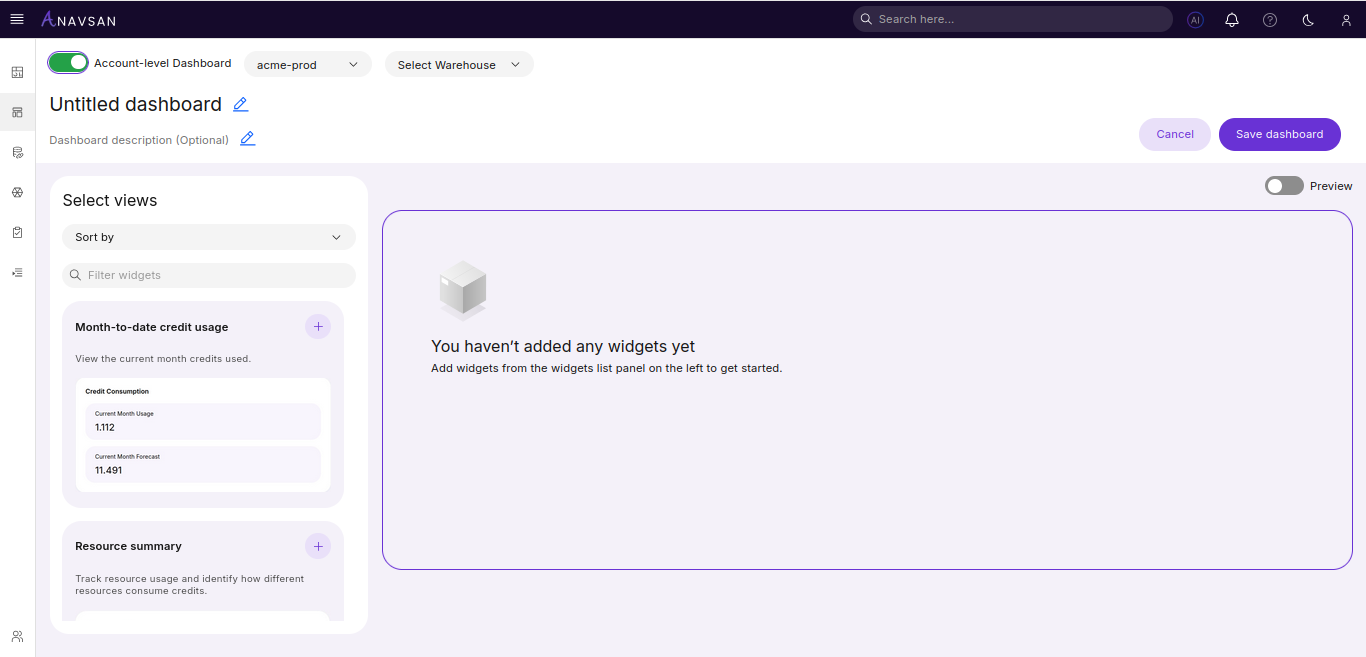
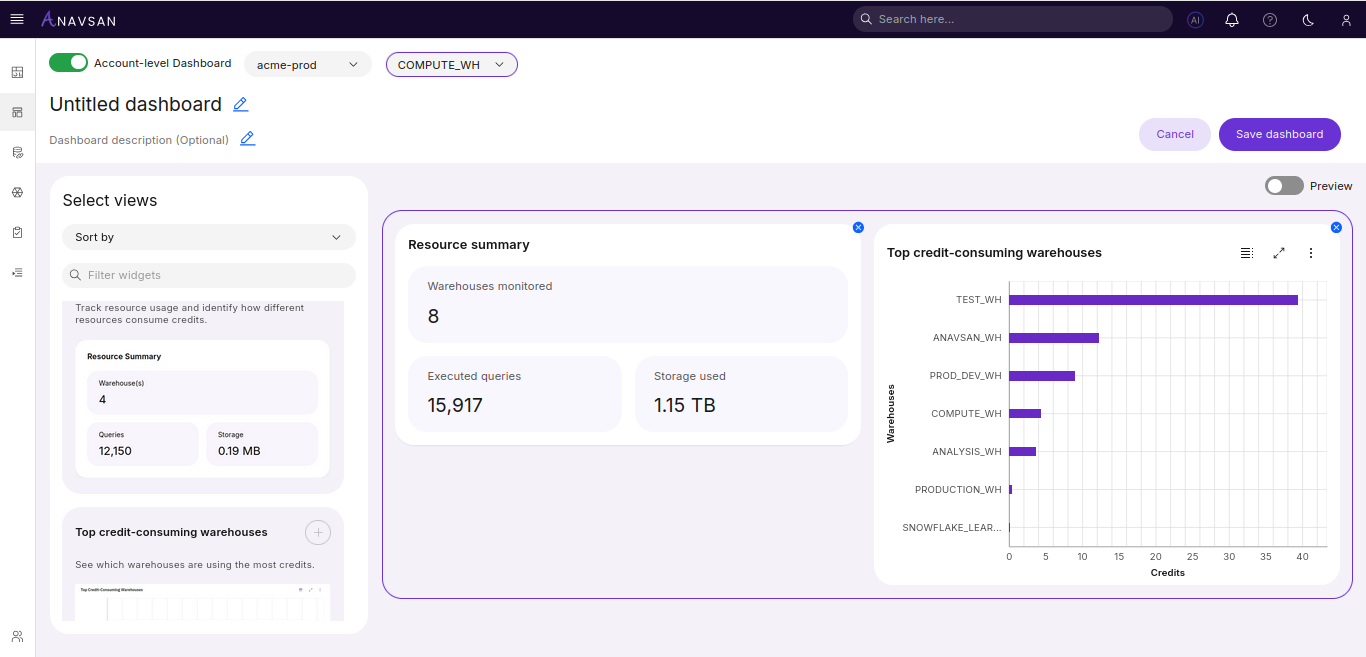
When Account-level Dashboard is selected, two dropdowns become active:
- Snowflake Accounts - Select which account to monitor
- Warehouse - Select a specific warehouse (lists warehouses from the selected account)
These selections define the data context for your dashboard widgets.
Step 2: Provide Title and Description
Enter:
- Dashboard name
- Dashboard description (optional)
These fields help identify dashboards in the list view.
Step 3: Sort & Filter Widgets
The widget panel allows you to sort and filter all available widgets.
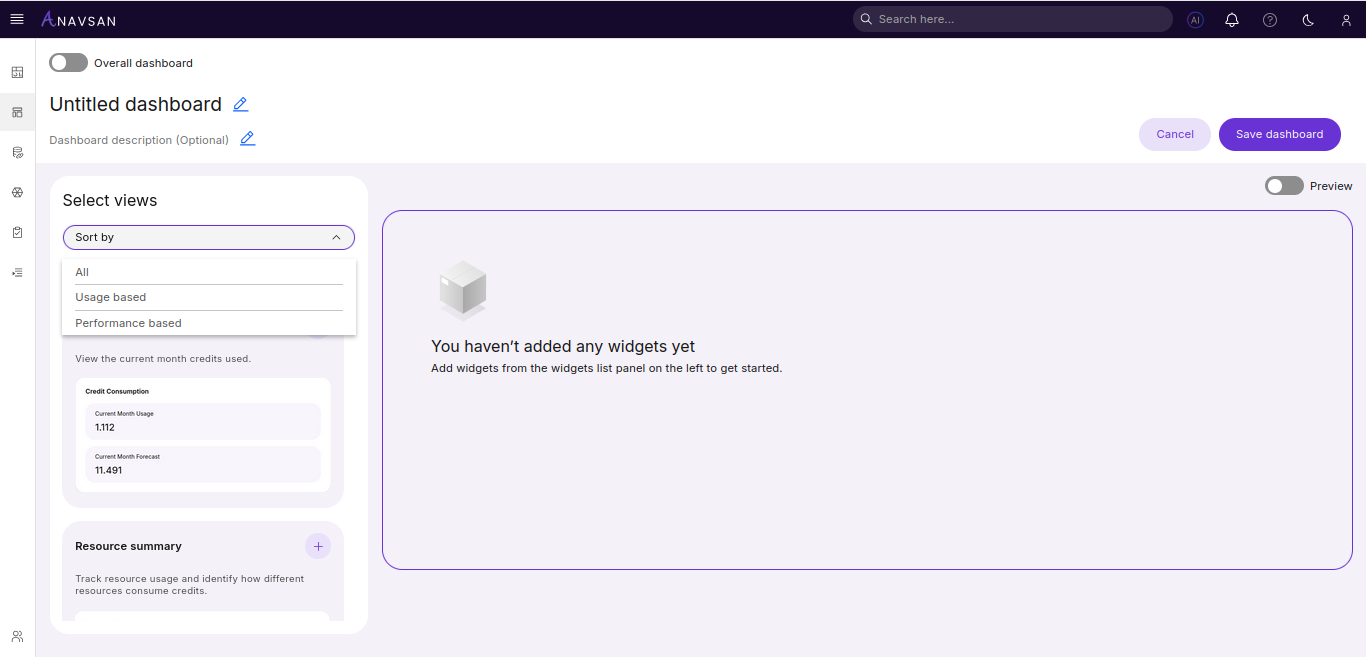
Available Controls
- Sort by
- All
- Usage based
- Performance based
- Filter widgets (search bar)
Use these options to quickly find the widgets you need.
Step 4: Add Widgets to the Dashboard
Click + symbol on any widget to add it to the dashboard canvas.
Once added:
- Widgets appear on the canvas
- You can drag them to rearrange layout
Step 5: Preview the Dashboard
Use the Preview toggle to see the dashboard as it looks in real-time.
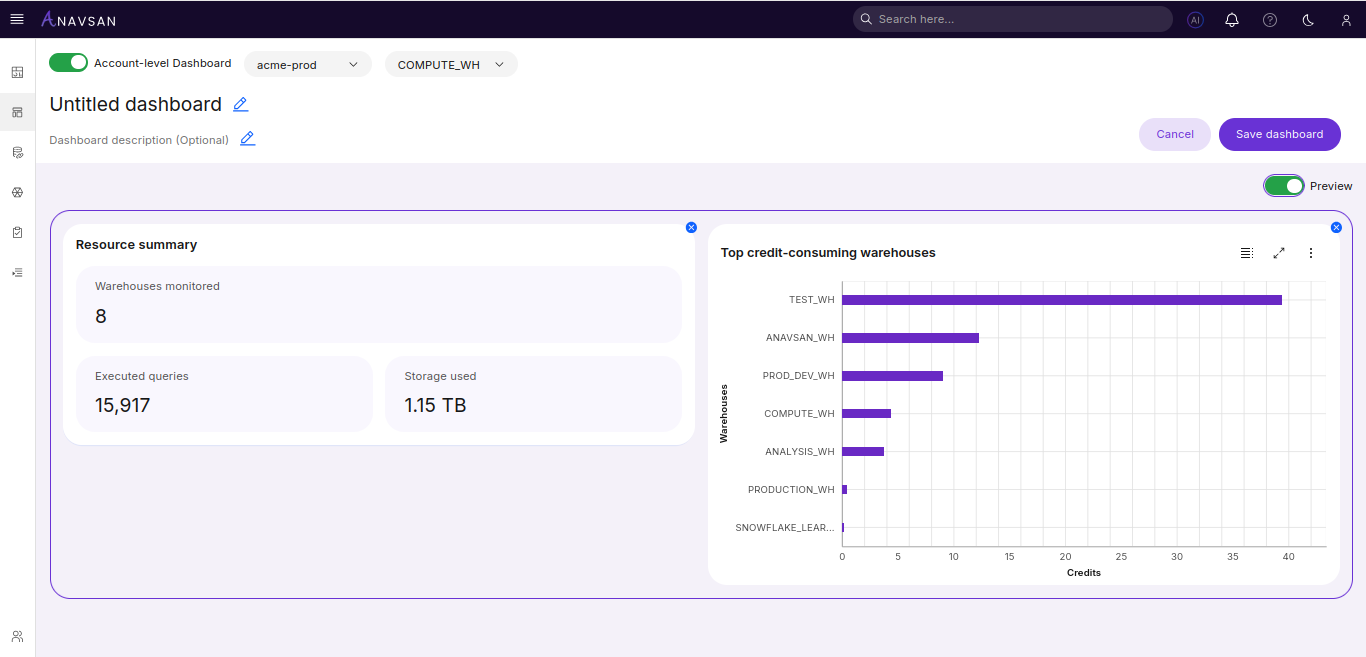
This helps confirm:
- Layout
- Widget order
- Overall presentation
Step 6: Save the Dashboard
Click Save dashboard to create or update the dashboard.
You will return to the dashboard list where your new dashboard appears.
Editing an Existing Dashboard
When editing, all the same features are available:
- Modify title or description
- Change scope
- Add or remove widgets
- Reorder widgets
- Preview and save